
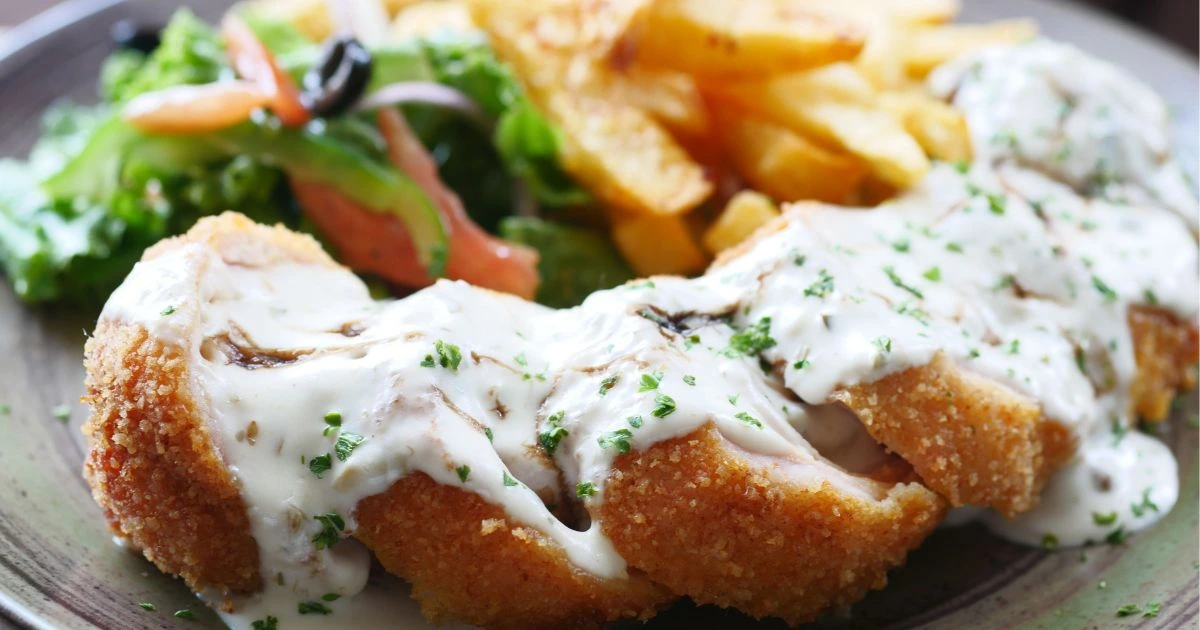
Easy Chicken with Mayo and Parmesan Cheese Recipe
Table of Contents
Easy Chicken with Mayo and Parmesan Cheese Recipe
A cozy family dinner can start with a few familiar ingredients and a golden, cheesy topping. This chicken with mayo and parm cheese recipe suits busy nights when you want an easy dinner without a long prep list. You need one baking dish, a few pantry seasonings, chicken, mayonnaise, and Parmesan.
The topping turns creamy in the oven and browns on top, giving the chicken a savory finish. You can get everything ready without juggling several pans or special tools. That makes the meal a useful choice when you want dinner to feel hearty but the prep to stay simple.
Poultry seasoning is a dried herb-and-spice blend used to season poultry. Its mild, savory flavor pairs well with garlic and Parmesan, so the topping does not need a long list of extra spices. The method also leaves room to choose sides that suit your family and the time you have.
The chicken cooks in the same dish where you spread the topping, which keeps cleanup manageable. You can prepare the pieces with a few simple steps, then let the oven do most of the work. This is a practical option when you want a hands-off dinner that comes together in the oven.
Key Takeaways
- The recipe makes six servings.
- Use boneless, skinless chicken breasts.
- Poultry seasoning and garlic powder flavor the topping.
- Coarsely grated Parmesan gives the topping texture.
- Use a thermometer to check that the chicken reaches 165°F.
- Pair the chicken with a vegetable, a starch, or both.
How Do You Make This Easy Chicken With Mayo and Parm Cheese Recipe?
You make this dish by coating chicken breasts with a seasoned mayonnaise and Parmesan mixture, then baking them until cooked through. The simple method uses one baking dish and makes six servings, so it can work for a family dinner or leave portions for later.
First, you even out the chicken so the pieces cook at a similar rate. Then you mix the mayo with coarsely grated Parmesan, poultry seasoning, and garlic powder. Spread that topping over the chicken before baking. The top browns as the chicken cooks, while the mixture helps keep the surface savory and moist.
Cook the chicken until its thickest part reaches 165°F, even when the topping looks browned.
This is a mayo-Parmesan chicken recipe, not a breaded cutlet. It has no crumb coating in its basic form, so the cheese gives the top its texture and browned finish. You can spread the topping evenly over each piece rather than piling it in the center.
The dish needs little hands-on work after you prepare the chicken and add the topping. A meat thermometer gives you a clear way to check doneness, since the chicken’s thickness can affect its cooking time. The finished dish is a savory main course that can be served family-style.
That straightforward approach makes the recipe easy to fit into a regular weeknight routine. You can set out the ingredients before you begin, then handle the side dishes while the oven cooks the main course. The yield is six servings, though the portions depend on the size of the breasts and how you divide them.
What Ingredients Do You Need?
Set out four large boneless, skinless chicken breasts and measure the topping ingredients before you start. The short list combines chicken with a creamy cheese mixture and two seasonings, with no breadcrumbs needed.
Use coarsely grated Parmesan for a topping with visible texture. The amounts below make enough topping for four large breasts and six servings.
Choose the Chicken and Mayonnaise
Large boneless, skinless chicken breasts form the base of the recipe. They are easy to arrange in a baking dish, and removing the bones and skin keeps the pieces simple to prepare. Large breasts may need to be divided after cooking if you want smaller portions.
Mayonnaise gives the topping its creamy base and helps the Parmesan and seasonings cling to the chicken. Use regular mayonnaise for the intended flavor and texture. It brings moisture and a mild tang, while the other ingredients add the main savory notes.
Measure the Parmesan and Seasonings
Coarsely grated Parmesan cheese works well because it keeps some texture when mixed with mayonnaise. Very fine cheese can blend into a smooth paste, while coarse shreds give the topping a more textured finish. The recipe uses no breadcrumbs, so Parmesan is the only grated cheese in the topping.
Poultry seasoning adds a dried herb-and-spice flavor. Garlic powder rounds out the mixture without adding moisture, and its fine texture spreads through the mayo evenly. Measure both seasonings before mixing so each part of the topping gets a similar flavor.
| Ingredient | Amount | Role |
|---|---|---|
| Chicken breasts | 4 large, boneless and skinless | Main protein |
| Mayonnaise | 3/4 cup | Creamy base for the topping |
| Coarsely grated Parmesan | 6 tablespoons | Salty flavor and texture |
| Poultry seasoning and garlic powder | 3/4 teaspoon each | Dried herb, spice, and garlic flavor |
How Each Ingredient Works in the Topping
The mayonnaise holds the grated Parmesan and seasonings together, making a spreadable mayo mixture. It also helps the topping stay on the surface instead of falling off as you prepare the chicken. Parmesan adds a sharp, salty taste that pairs with the mild flavor of the meat.
Garlic powder and poultry seasoning bring flavor without adding extra steps. Since the recipe uses a small number of ingredients, each one has a clear job. You do not need breadcrumbs to make the topping cling or brown.
Measure the cheese loosely rather than pressing it into the cup or spoon. That keeps the amount consistent and leaves the shreds able to mix through the mayonnaise. Keep the Parmesan coarsely grated so it can form a textured topping rather than a powdery layer.
How Do You Prepare Chicken for Baking?
Even thickness matters because a thin edge can dry out before a thicker part is cooked. Pound each chicken breast to about 1/2 inch thick, then spread the mayo-Parmesan mixture across its surface.
Work gently so the meat stays in one piece. Hard pounding can tear the chicken and leave uneven sections that cook at different rates.
Pound the Breasts to an Even Thickness
Set a breast inside a sturdy bag before pounding it. The bag helps contain splashes and makes it easier to move the chicken after you flatten it. Use the flat side of a meat mallet, or another tool with a broad, smooth surface.
Press with steady, light strokes rather than striking hard. Start at the center and work toward the thicker areas until the breast is close to an even thickness. If a breast begins to shred, stop and handle the next piece more gently.
Some chicken breasts have a narrow end and a thick center. Flattening the thick part helps the whole piece cook more evenly, while avoiding excessive force keeps the meat intact. The goal is an even piece, not a paper-thin cutlet.
Spread the Mayo-Parmesan Mixture
Once the chicken is ready, place it in a baking dish sized to hold the pieces without crowding. Shallow crosswise slits can help the chicken cook evenly and keep more topping in place. Make only light cuts, and do not slice all the way through the meat.
- Place each breast in a bag and pound it gently to about 1/2 inch thick.
- Make shallow crosswise slits in the surface without cutting through the chicken.
- Arrange the pieces in the baking dish and spread the topping over each one.
Spread the mayo mixture with the back of a spoon or a small spatula. A thin, even layer reaches the edges without forming a heavy mound in the center. Keep the chicken in a single layer so each piece has room in the dish.
The shallow cuts give the topping small places to settle, while the even coating helps the surface brown more uniformly. If some grated Parmesan shifts as you spread, nudge it back over the meat with the utensil. Spread the topping over the whole surface of each breast so the cheese is not concentrated in one spot.
How Long Does Mayo Parmesan Chicken Bake?
Bake the coated chicken at 375°F/190°C for 35-40 minutes, checking that the thickest part reaches 165°F. The safe internal temperature is 165°F, and a thermometer gives you a more reliable check than color alone.
Timing is a guide, since chicken thickness affects when the meat reaches the safe temperature. Check for a firm texture and a browned topping as visual cues, but use the temperature reading to decide when it is done.
- Preheat the oven to 375°F/190°C before baking the chicken.
- Begin checking as the 35-40-minute baking window approaches.
- Insert a meat thermometer into the thickest part and confirm 165°F.
Put the thermometer into the thickest section of a breast, keeping the tip away from the baking dish. Check a second piece if the breasts vary in size. The lowest reading tells you whether the chicken needs more time.
A browned top can appear before the center is fully cooked. The chicken should also feel firm, but firmness is not a substitute for a thermometer reading. If the top is browned and the center is below the safe temperature, keep baking and check again.
Chicken pieces that differ in thickness may finish at different times. Remove a piece once it reaches the safe temperature, while allowing any larger pieces to keep cooking. That approach helps avoid drying out portions that are already done.
Do not judge doneness by the clock alone. The oven setting, the shape of the chicken, and how evenly the breasts were prepared can affect the cooking time. Use the thermometer reading, rather than browning alone, as the final doneness check.
What Goes Well With Parmesan Chicken?
Pair the rich Parmesan topping with a crisp salad or a simply cooked vegetable for contrast. Green beans and asparagus also suit this savory chicken, while rice, mashed potatoes, or dinner rolls make the meal more filling.
Choose sides that balance the rich topping without adding extra work. A fresh or simply prepared side keeps the main course at the center of dinner.
Pair It With Vegetables or Salad
Green beans bring a mild, fresh flavor that works well beside the cheese. Asparagus offers a firmer bite, while a small salad adds cool, crisp leaves to the plate. Each option gives you a vegetable-forward dinner without making the meal feel heavy.
A salad can be as simple as greens with a light dressing. If you already have vegetables in the fridge, use them to build a side that suits your family. The Parmesan chicken has a savory surface, so a clean, fresh flavor gives the plate contrast.
Add Rice, Potatoes, or Bread
Rice makes a neutral base that can catch a little of the flavor from the dish. Mashed potatoes create a more filling plate, while dinner rolls give everyone an easy side to add. Pick one starch based on how much time you have and how hearty you want dinner to be.
For a busy night, serve the chicken with rice and a side salad. The rice is easy to prepare while you get the table ready, and the salad adds a fresh element. That combination needs no extra sauce or elaborate prep.
You can also keep the sides separate for family-style serving, which lets everyone choose a portion. A vegetable and a starch give the meal a clear balance without competing with the chicken’s flavor. Choose one vegetable side and one starch when you want the chicken to anchor a complete dinner.
Why Is There Liquid in the Baking Dish?
A little liquid and set cheese in the bottom of the dish does not mean the topping has failed. The pooled mixture can include moisture from the chicken and congealed cheese that drops from the surface during cooking.
Some liquid or set cheese under the chicken can be normal. A baking dish just large enough to hold the pieces helps keep them together, but it does not promise a dry pan.
Chicken releases moisture as it cooks, and some of the mayo-Parmesan topping may slide away from the meat. Once it reaches the bottom, the cheese can cool and set around the liquid. That can look messy, but it does not by itself mean the chicken is ruined.
A close-fitting baking dish keeps the pieces from shifting around in a wide layer of liquid. Avoid choosing a dish so small that the chicken is crammed together, though. The aim is to hold the pieces snugly, not to seal them into a tight stack.
The browned topping is the part you want to keep on the chicken. When moving the pieces, slide a thin spatula under each breast and lift steadily. Let excess liquid remain in the dish instead of spooning it over the top.
Set the cooked pieces on a serving platter rather than leaving them in the pooled juices. A brief rest helps the meat settle before you cut or serve it. Rest the chicken for 5 minutes, then lift the pieces onto a platter rather than serving them from the pooled liquid.
What Is the Nutrition Per Serving?
Each serving provides 343 calories and 27g of protein. The per-serving figures below give the amounts for the recipe’s six-serving yield.
Each serving has 2g of carbohydrates and 0g of fiber. Your portion size affects how much you eat, so use the serving basis when comparing this meal with other foods.
| Nutrient | Amount per serving |
|---|---|
| Calories | 343 calories |
| Total fat and saturated fat | 25g total fat; 5g saturated fat |
| Cholesterol and sodium | 84mg cholesterol; 324mg sodium |
| Carbohydrates, fiber, and protein | 2g carbohydrates; 0g fiber; 27g protein |
The amounts are listed for one serving, not for the full baking dish. The recipe makes six servings, and the figures include calories, fat, cholesterol, sodium, carbohydrates, fiber, and protein. Divide the cooked chicken into six portions for a serving size that matches the table.
Protein is the largest listed nutrient amount by weight, while carbohydrates remain low in this recipe. The fat figure includes both total and saturated fat, which are separate measures. Reading the units helps you compare each value correctly.
Serving sizes can shift if you cut the breasts into larger or smaller pieces. For a closer match, portion the full batch into six servings rather than treating each breast as one serving. Use the per-serving figures as a guide when deciding how this dish fits your meal.
How Should You Store and Reheat Leftovers?
Refrigerate leftover chicken in an airtight container and use it within 3-4 days. Quick chilling keeps cooked portions ready for another meal without leaving them exposed in the baking dish.
Keep the cooked chicken sealed and chilled between meals. Reheat it in a low oven or microwave until hot throughout.
Reheat only the portion you plan to eat so the remaining chicken can stay chilled.
- Transfer leftover chicken to an airtight container.
- Refrigerate the container and use the chicken within 3-4 days.
- Reheat a portion in a low oven or microwave until hot throughout.
Let the chicken cool enough to handle, then move it to a clean container with a tight lid. A shallow container can make it easier to store pieces in a single layer. Keep the leftovers covered while they are in the refrigerator.
For oven reheating, place a portion in an oven-safe dish and warm it gently. A microwave works for a quick serving; heat the chicken in short intervals and check the center between them. Both methods should heat the meat throughout.
The topping may soften during storage, so it may not keep the same browned texture as when freshly baked. The flavor still works well for a next-day meal. Reheat only the portion you plan to eat so the remaining chicken can stay chilled.
Conclusion
This family dinner relies on a short ingredient list and a simple oven method. Even thickness helps the chicken cook at a steadier pace, and a thermometer check gives you a clear doneness test.
The mayo-Parmesan topping brings a savory finish without a breading step. Choose a vegetable or starch side that fits your schedule, then portion any extra chicken for the refrigerator.
Set out the ingredients and choose your sides before you begin.
FAQ
Can boneless chicken thighs replace the chicken breasts?
Yes, boneless chicken thighs can replace chicken breasts, but the baking time may change with the cut and thickness. Arrange the thighs in a single layer and check the thickest part with a meat thermometer. Poultry is safely cooked when it reaches 165°F inside. Since thighs may have a different shape, check each piece rather than relying on one reading for the whole dish.
Can you use Miracle Whip instead of mayonnaise?
You can use Miracle Whip, but it is not a like-for-like swap for mayonnaise in this topping. Miracle Whip has a tangier flavor and may change the balance of the Parmesan and seasonings. The recipe is designed around mayonnaise’s mild, creamy taste. If you choose Miracle Whip, expect a more pronounced sweet-and-tangy flavor in the finished chicken.
Can you use shelf-stable grated Parmesan?
Yes, shelf-stable grated Parmesan can be used, but the topping will have a different texture. Coarsely grated or freshly grated Parmesan gives the mixture more texture and a less powdery finish. The fine shelf-stable kind blends more smoothly into the mayonnaise. Use the coarsely grated cheese when you want the topping to keep visible shreds.
Can you add breadcrumbs to the topping?
Yes, about 3/4 cup of panko can add crunch to the topping. Sprinkle it over the mayo-Parmesan mixture so it sits on the surface as the chicken bakes. Panko changes the topping from its basic cheese-forward texture and adds carbohydrates. If you prefer a softer top, leave the breadcrumbs out.
Should you rinse chicken breasts before coating them?
No, do not rinse chicken breasts before coating them. Rinsing can spread raw poultry juices around the sink and counter. Pat the chicken dry with paper towels instead, then throw the towels away and wash your hands. Dry surfaces also make it easier for the topping to spread across the meat.
Can you mix the topping ahead of time?
Yes, you can mix the topping ahead of time and keep it covered in the refrigerator. Store it separately from raw chicken until you are ready to coat the pieces. Use a clean spoon or spatula to spread it, rather than putting a utensil that touched raw chicken back into the bowl. Stir the chilled mixture briefly if it firms up.